In part 2 of this blog series, we started two instances and configured the opensta name servers so that one instance became the master and the other a slave. To make this example a little more interesting, I'll be illustrating a few concepts I discussed in my first blog on performance testing strategies.
For this exercise, the sample workload definition is as follows:
- Script1 will be executed 30% of the time. It will access the home page for www.iperformax.com and record the elapsed time with a label of "homepage".
- Script2 will be executed 60% of the time. It will access the page for services at http://www.iperformax.com/services.html and record the elapsed time with a label of "services".
- Script3 will be executed 10% of the time. It will access the page for services at http://www.iperformax.com/testimonials.html and record the elapsed time with a label of "testimonials".
- The average time spent viewing a page will be 4 minutes.
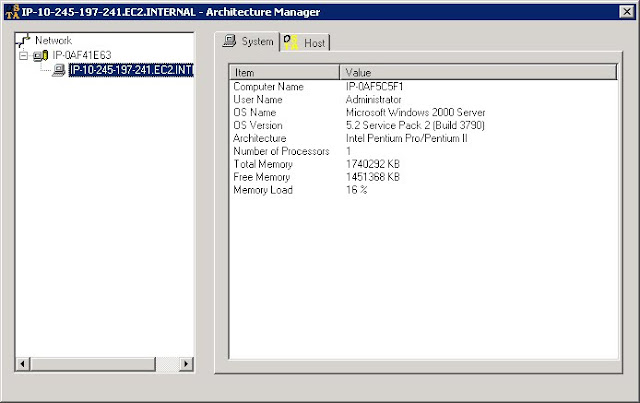
This is not meant as an OpenSTA scripting tutorial (read more about mentoring, training, and support available from Performax), but I will post the master script that I developed for this example. Lets review where we are with respect to injectors, in the OpenSTA commander menu->Tools->Architecture Manager shows the following.

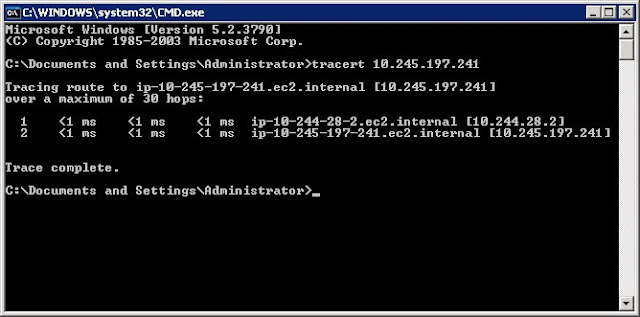
This output indicates that the master node's server name is IP-0AF41E63 and the slave (highlighted in reverse video) is named IP-0AF5C5F1. A good check to do at this point is verify that both master and slave are on the same subnet. To do so, I will initiate a trace route from the master node to the slave.
Indeed they are. In fact, they are on the same physical server. If on different servers, you would see at least two more hops. If on different subnets, the IP address outside of the 10.X.X.X range would NOT have identical values for the first 3 numbers (X.Y.Z.*) in the IP addresses. I have never launched multiple servers into the same region at the same time and had them end up on different subnets. While apparently rare, it can happen and any two servers located on different subnets will not work together in a master/slave distributed test as is being described here.
I have tried to add to a set of instances launched earlier in the day (same region) and found the new ones were on different subnets. If you think you will need 10 servers, launch them at the same time or you may have to start over. There is a way (OpenSTA daemon relay) to work around the subnet restriction, but it is beyond the scope of this post.
The astute reader will notice that these two addresses in the trace route output are not on the same subnet. Well, the REAL restriction (AFAIK) here is that the nodes must be able to send multi-cast messages to each other, and the way the network is implemented between VMs allow instances on the a physical machine to send multi-cast messages to each other even though their addresses may indicate they are on different subnet.
Ok, back to commander. I have created a master script. Since we are running a two server test, I will need to create two task groups. First I create a test called BLOG_TEST and then drag and drop the master script onto the test grid under task1.
By default, this task group is assigned to localhost (the master server). Lets customize this task group to run half of the users and then clone it to also run on the slave. Click on the VUs column for task 1, and check the box to 'Introduce virtual users in batches' to open the batch start options dialog. I will assign 1,200 VUs according to the ramp-up I described earlier.
The last step is to clone this task group (right mouse anywhere on the first task group and select 'duplicate task group') and change the HOST cell to IP-0AF5C5F1(the slave server name). I could also specify the ip address of the slave node here instead of typing the server name. The second task group is now a clone of the first, but will run from the slave.
Before we start here is a look at the master script that will run Blog_Scenario_1 30% of the time, Blog_Scenario_2 60% of the time and Blog_Scenario_3 10% of the time.
There you have it. It took a lot longer to write this than it did to setup the instances, create the scripts, and run the test. I will be making my OpenSTA instance available via Amazon's EC2 in the near future. It comes with a special build of OpenSTA that is customized for .NET applications (large variable support and built in URL encoding) plus an OpenSTA script processor that does automated viewstate handling and allows creating scripts without hours of manually editing. For more information on using this instance or questions about projects, training or support, email me at bernie.velivis@iperformax.com
Bernie Velivis, President Performax Inc


No comments:
Post a Comment